This Mina the Hollower walkthrough covers the recommended dungeon order, what unlocks after each area, how to access the Astral Orrery, missable items, Bones benchmarks per boss, and true ending requirements. Use this Mina the Hollower walkthrough guide alongside the mirror guide for the fastest route to the true ending.
Mina the Hollower is an open Metroidvania, so area order is not fully locked. However, a soft intended route exists based on enemy difficulty scaling and item availability. Deviating from it significantly mid-game leads to hitting walls on bosses with insufficient upgrades.
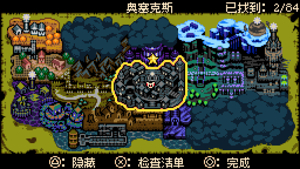
| # | Area | Direction from Ossex | Time Est. |
|---|---|---|---|
| 1 | Queensbury Crypt | Northeast | 1.5–3 hrs |
| 2 | Nox’s Bayou / Backwater | Southwest | 2–3 hrs |
| 3 | Septemburg / Kindlewood | Northwest | 2–3 hrs |
| 4 | Coltrane Peak | North | ~2 hrs |
| 5 | Bone Beach / Sandfall | Southeast | 2–3 hrs |
| 6 | Deprived Path + Astral Orrery finale | Via 3 mirrors | 2–4 hrs |
Total: approximately 18 hours for a focused first run. Completionists (all secret bosses, all trinkets) should budget 25–30 hours. The speedrun trophy requires a full clear in under 4 hours.

Ossex is the central hub connecting all regions. Several early actions here have a large impact on the rest of the run. Do not rush past them.
Head south of Ossex to the Rebel Barracks. Find Rhene, escort her safely back, and heal her when prompted. Once she reaches the Hollower Guild Hall, free Drillhardt inside. He sells you a basic map for 500 Bones — buy it immediately. After completing Septemburg, he sells an Enhanced Map for another 500 Bones, which adds collectible detail. Playing without a map is possible but significantly slows exploration.
Visit Legovich’s Arms in Ossex to pick your weapon. See the weapons guide for full breakdowns. Community recommendation for new players: Nightstar (flail) for its reach, or Battery Buster for players who prefer ranged combat. You can switch weapons at any point at no cost.
You start with 4 trinket slots. The Trinket Bag upgrade expands this to 6 — buy it as soon as it appears in a shop. Also look for the Primed Vial Pouch trinket, which increases your healing item count, before the first dungeon. These two items have the largest survivability impact in the early game.
A fast-travel train station can be unlocked by donating 10,000 Bones total. Start contributing early. The station is tied to late-game progression and the true ending — ignoring it forces slower traversal across the island in the later hours.
The intended first dungeon. Gothic crypt and manor environment. Boss difficulty is calibrated as the easiest of the six generators, making it the right place to learn Hollowing timing and burrow mechanics.
2–3 HP upgrades, at least one trinket slot open, and Primed Vial Pouch or equivalent equipped. The boss is learnable without heavy investment, but Proto Spark significantly reduces frustration on first attempts.

Dark swamp environment with water traversal mechanics. More enemy variety than Queensbury Crypt. The optional Willis secret boss is located in or around this region.
Gothic farmland with a distinct Crow Town sub-area. One of the more visually striking regions. Contains the Septemburg mirror, one of the six fast-travel connection points.
Ice mountain environment with slippery floors and elevated platforming. One of the harder regions due to environmental hazards layered onto the normal combat. The Mirren secret boss is found in or around this region.
Coastal graveyard and desert environment. Contains the Dark Deluxy secret boss. One of the six mirrors is located here. By this point you should have 3+ mirrors activated, giving you access to Mirror’s End and the ability to unlock the northern path to the finale.

The final stretch. Astral Orrery is a celestial realm accessed only through the Mirror’s End network. It is the hardest region in the game with the most demanding boss fights. Budget 2–4 hours depending on difficulty and how many mirrors you have activated for fast travel.
You need exactly 3 activated mirrors to open the blocked northern path in Mirror’s End. Any combination of 3 from the available mirrors works. If you have been activating mirrors as recommended throughout the walkthrough, you will have 4–5 by now.
To enter a mirror: hold the movement direction into it repeatedly until Mina phases through. Do not press an interact button. Once inside, find and activate the gold mechanism in the room. Leaving without triggering the mechanism means the mirror does not count as activated for progression.
An optional but recommended late-game area with high-value trinkets and lore content. Complete it before entering the Astral Orrery if aiming for full completion.
Multi-phase fight. Ensure you have: Proto Spark equipped, Plasma Vials fully stocked, and a combat trinket loadout you are comfortable with. See the boss guide for specific strategies. After the final boss, the ending plays based on whether you met the true ending requirements.
There are 6 enterable mirrors across Tenebrous Isle plus a seventh exit-only mirror used in the endgame. You need 3 activated for story progression, but activating all 6 provides full fast-travel coverage across the island.
| Mirror Location | Region | Required for 3-mirror gate? |
|---|---|---|
| Queensbury Crypt mirror | Northeast | Counts toward any 3-mirror set |
| Nox’s Bayou mirror | Southwest | Counts toward any 3-mirror set |
| Septemburg mirror | Northwest | Counts toward any 3-mirror set |
| Coltrane Peak mirror | North | Counts toward any 3-mirror set |
| Bone Beach mirror | Southeast | Counts toward any 3-mirror set |
| Ossex area mirror | Central hub | Counts toward any 3-mirror set |
See the full mirror locations guide for exact screen positions of each mirror, including the harder-to-find Ossex area and Bone Beach mirrors.
These items and events can be permanently missed on your current playthrough if skipped. All are recoverable in New Game Plus.
| Item / Event | How to Get | Miss Risk |
|---|---|---|
| Proto Spark (trinket — extra life) | Find the Duke before the Queensbury Crypt boss. Guide him through a platforming puzzle. After defeating the boss, throw him into a coffin while escorting him out. | High — miss if boss killed first |
| Basic Map (navigation) | Rescue Rhene at Rebel Barracks south of Ossex, escort to Guild Hall, free Drillhardt. Buy map for 500 Bones. | Medium — delays all collectible hunting |
| Enhanced Map (navigation upgrade) | Available from Drillhardt after completing Septemburg. Buy for 500 Bones. | Medium — missable if Drillhardt not freed first |
| All-Seeing Skull (collectible detector) | Purchasable from a shop after completing Coltrane Peak. Glows red for on-screen collectibles, blue for nearby collectibles. | Low — just buy it when available |
| Train Station Fast Travel | Donate 10,000 Bones total to the train station fund in Ossex. Tied to true ending and late-game progression. | Medium — requires consistent Bones donations |
| All Trapped Children (true ending) | Each major dungeon contains trapped children. Rescue all of them during dungeon completion. | High — required for true ending, easy to overlook |
The game has no fixed level system. Think in terms of: "Have I bought key trinkets and 2–3 core stat upgrades?" rather than a numeric level. These are the community-recommended checkpoints.
| Boss | Recommended Before Attempting |
|---|---|
| Queensbury Crypt boss | 2–3 HP upgrades, 1+ trinket slot, Primed Vial Pouch equipped. Enough Bones spare to fund Proto Spark quest reward. |
| Nox’s Bayou boss | 3–4 HP upgrades, 1–2 Attack or Defense Bone Ups, at least one crowd-control sidearm equipped. |
| Septemburg boss | Similar to Bayou with slight increase. At least one safety-net trinket (Proto Spark or equivalent) equipped. |
| Coltrane Peak boss | Extra HP Bone Ups due to environmental hazard damage. Steady Soles trinket equipped. Defense Bone Ups prioritised over Attack. |
| Bone Beach boss | Most major HP and Bone Up purchases complete. Full trinket loadout with healing, extra life, and at least one damage trinket. |
| Astral Orrery final boss | All remaining HP and Bone Ups complete. Proto Spark, healing trinket, and damage trinket all equipped. Plasma Vials fully stocked before entering. |
Completing the final boss without the optional objectives gives a normal ending. The fuller “true” ending requires meeting several additional conditions before the finale.
Recommended: Queensbury Crypt (northeast) → Nox’s Bayou (southwest) → Septemburg (northwest) → Coltrane Peak (north) → Bone Beach (southeast) → Astral Orrery finale. This matches the soft intended difficulty scaling and item availability curve.
Rescue Rhene at the Rebel Barracks south of Ossex and escort her to the Hollower Guild Hall. Free Drillhardt. Buy the basic map for 500 Bones. Also buy the Trinket Bag upgrade and Primed Vial Pouch if available. Then head northeast to Queensbury Crypt.
Exactly 3 activated mirrors unlock the blocked northern path in Mirror’s End leading to the Astral Orrery. Any combination of 3 from the 6 available mirrors works. Activating additional mirrors just provides more fast-travel points.
Walk up to the mirror and hold the movement direction into it until Mina phases through. Do not press a button — just hold direction. Inside, find the gold mechanism and activate it. Leaving without triggering the mechanism means the mirror does not count as activated for story progression.
Proto Spark is a trinket that revives Mina with most of her health once per checkpoint (recharges at every checkpoint). To get it: find the Duke inside Queensbury Crypt before fighting the boss. Guide him through a platforming puzzle to safety. After defeating the boss, escort him out and throw him into a coffin. If you fight the boss before finding the Duke, the quest fails permanently for this playthrough.
Yes. The true ending requires: all 5 generators restored, all trapped children rescued from dungeons, key NPC arcs completed (Duke, Thorne, Hollower Guild), and the train station funded with 10,000 Bones. Simply defeating the final boss without these gives a normal ending. The most-missed requirement is rescuing all children — use the All-Seeing Skull (available after Coltrane Peak) to find them.
Approximately 18 hours for a first playthrough with moderate exploration. Completionists hunting all secret bosses, all trinkets, and the true ending can expect 25–30 hours. The speedrun trophy requires finishing in under 4 hours.
Return to Ossex and spend any unspent Bones on upgrades at the Underlab and Legovich’s Arms. If you are dying repeatedly, you likely skipped a Bone Up or trinket purchase. Check the Bones benchmarks table on this page for the recommended upgrade level per boss. Also see the boss-by-boss strategy guide for specific tactics.
All 26 bosses with full strategies, trinket loadouts, and secret boss unlock conditions.
First weapon choice, Hollowing basics, Bones management, and early-game priorities.
All 6 mirror locations with exact map positions and activation instructions.