
26 confirmed boss fights · 9 secret bosses · strategies · trinket loadouts
Mina the Hollower wiki guide

Mina the Hollower Bosses

All confirmed Mina the Hollower bosses — 26 major boss fights across multiple regions and 9 secret bosses with full unlock conditions, key strategies, and recommended trinket loadouts.

26 Boss Fights9 Secret BossesStrategies & Loadouts
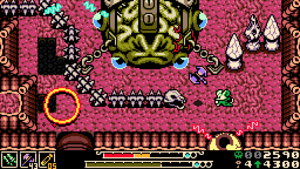
Mina fighting a giant boss in Mina the Hollower
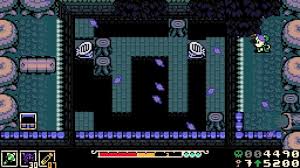
Nox's Beast boss fight Queensbury Crypt dungeon
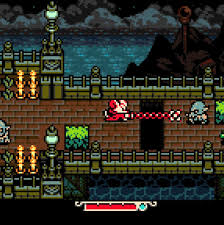
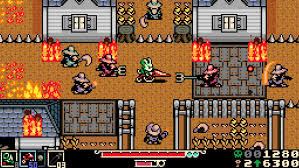
Mina the Hollower combat Septemburg combat area
Also useful: ⚡ Best Builds 💎 Trinkets 📺 Walkthrough ⚔️ Weapons 🔸 Sidearms

Mina the Hollower Boss Prep Checklist

Complete these steps before every boss attempt to minimise avoidable deaths. Your progress is saved automatically in this browser.

Trinket Tip → Choosing the right trinkets can make or break a boss fight. Swap your loadout before blaming the encounter. See the Trinkets Guide →

Mina the Hollower Boss Difficulty Matrix

Each dimension rates how much that factor affects difficulty across boss encounters. Click any card to expand the full strategy note.

👁 Readability click to expand
How clearly the boss telegraphs attacks — 3/5

Low readability means the guide should explain visual cues first. Watch the boss for one full cycle before attacking. Hollowing allows repositioning even mid-pattern, so use it to read rather than just escape.

⚡ Movement Pressure click to expand
How much the fight limits safe movement — 4/5

High movement pressure means Hollowing and positioning notes matter most. Keep Hollowing available for escape, use sidearms to deal damage from a distance, and avoid committing to long attack animations when the arena is tight.

💀 Resource Risk click to expand
How likely repeated deaths are to cost Bones — 5/5

High risk means the page should strongly recommend spending Bones before attempts. Do not approach a boss with a large resource stack until you have the fight under control. Resource anxiety leads to rushed attempts and more deaths.

⚙ Loadout Dependency click to expand
How much weapon/trinket choice changes the fight — 3/5

High loadout dependency means multiple viable setups should be listed, not a single answer. Some players solve a fight with aggressive weapons; others with defensive trinkets and patient sidearm use. Neither approach is wrong if it works.

Mina the Hollower Main Story Bosses

Main story boss fights spanning multiple regions of Tenebrous Isle. Community database confirms 26 major boss fights total. Use the progression table below to decide which boss to attempt next based on what you have unlocked.

Recommended Boss Order & Progression

Each region rewards a Spark Generator that powers Ossex and unlocks the next area. Do Queensbury Crypt first — Proto Spark makes every fight after it easier.

OrderBossRegionCome Prepared WithKey Unlock
1Nether KrakenPrologueAny ranged sidearmAccess to Tenebrous Isle
2The DuchessQueensbury CryptVolt Hatchet or Drill Driver; any weaponProto Spark trinket — do this first, always
3Nox’s BeastNox’s BayouProto Spark equipped; ranged sidearmNox’s Bayou Generator; opens Bone Beach route
4The Carving ManSeptemburgWeapon Upgrade 1; Evasion Powder trinketOpens Septemburg Generator path
5SkullpoxSeptemburgArea-clear sidearm (Bounding Bombs); Pit PreserverSeptemburg Generator restored
6ThorneColtrane PeakNightstar recommended; Dummy Cache trinketOpens Coltrane Peak deeper areas
7SmorgasboarBone BeachWeapon Upgrade 1+; Bellows Bustle for mobilityBone Beach Generator restored
8Mined MindBone BeachRecall Disc sidearm; patience — long fightBone Beach area complete
9Frozen HorrorColtrane PeakThermal Pack trinket; Weapon Upgrade 2 if possibleColtrane Peak Generator restored
10AstromancerAstral OrreryFull trinket loadout; Recall Disc for gravity shiftsAstral Orrery progress; late-game unlocks
BossAreaKey DangerStrategy & Phase NotesMost Common DeathReward
Nether Kraken Prologue — Ossex Coast Tentacle sweeps, pulls you toward its mouth Ranged sidearm to hit from distance. Burrow immediately when a tentacle sweep starts — the window is generous. When the pull starts, move toward the edge of the boat and stay there. Standing still during the pull and getting caught by a tentacle while repositioning Prologue completion, reach Tenebrous Isle
The Duchess
Do First
Queensbury Crypt Wide stone-arm swings; jumps to trigger arrow traps Phase 1: Burrow the moment you see the arm wind-up. Move to her far side when she jumps to the trap buttons — she blocks the arrows for you. Phase 2 (half health): Arm swings become faster. Volt Hatchet or Drill Driver for safe ranged damage. Nightstar with Upgrade 1 keeps you at ideal distance for the whole fight. Being too close during Phase 2 arm swings; arrow traps hitting from behind Proto Spark trinket, Queensbury Generator
Nox’s Beast Nox’s Bayou Bouncing attacks across deep-water arena; second mouth suck-in Phase 1: Stay on the three dry platforms. Track the bounce trajectory and move perpendicular to it, not straight back. Phase 2 (suck-in activated): Equip a throwable sidearm before this fight — Gyro Dagger or Volt Hatchet works. Fire into the open mouth during the suck. Dodge by jumping sideways before the bounce lands, not after. Falling into the water during a repositioning jump; not having a ranged sidearm for the suck phase Nox’s Bayou Generator
The Carving Man
Missable Trinket
Septemburg Short lunges; grab lunge; spawns four chasing heads late in fight Phase 1: Stay directly above or below — all attacks go horizontal. Phase 2 (lightning): Circular waves: jump over. Spinning waves: burrow. Alternate. Phase 3 (four chasing heads): Stop attacking the boss. Destroy all four heads first — being caught between heads and the boss body is a guaranteed death. Only re-engage after the arena is clear. Getting cornered between the four heads and the boss body in Phase 3 ⚠ Save the students first — there is a unique trinket tied to the student-rescue quest in Septemburg. If you defeat The Carving Man before completing it, the trinket is permanently missed. Septemburg progress
Skullpox Septemburg Poison projectiles; skull minion summons Treat each minion wave as a mini-fight before re-engaging Skullpox. Bounding Bombs or Gnawing Ghosts clears minion clusters fast. Burrow through poison clouds rather than trying to dodge around them — the cloud hitbox extends further than it looks. Attack Skullpox only during the brief pause after a projectile volley. Getting hit by a poison cloud while focusing on Skullpox and ignoring a minion behind you Septemburg Generator
Thorne Coltrane Peak Trident three-hit combo tracks you; bomb trails; tornado burst Trident combo: Bait all three hits deliberately, then punish during the full recovery animation. Bomb trail: Stay diagonal from Thorne — never directly ahead or behind. Tornado burst: Burrow as soon as the warning appears, not when the tornado reaches you. Nightstar is ideal: its reach lets you punish without closing in after the combo. Burrowing too late for the tornado burst; standing in the bomb trail path Coltrane Peak progress
Smorgasboar Bone Beach Charge attacks; ground-slam shockwaves Charges: Let the boar commit to a charge, step aside at the last moment, and bait it into a wall to trigger the stagger. That stagger window is your main damage phase. Shockwaves: Jump immediately or burrow — do not try to run away horizontally. Bellows Bustle trinket (air dash) makes both dodges significantly easier. Blaststrike Maul deals maximum charge damage during the stagger window. Misjudging shockwave timing and getting hit at the edge of the wave radius Bone Beach Generator
Mined Mind Bone Beach Remote-detonated mine placement; splits into smaller forms Mine phase: Watch where mines land and memorise two safe zones before moving. Never detonate them by accident — keep distance. Split phase: The smaller forms are faster but have much less health. Pick a single target and kill it before engaging the next. Recall Disc lets you teleport out of a cluster instantly. This is an attrition fight — Proto Spark and Iron Lung over damage trinkets. Accidentally triggering a mine cluster while retreating from the smaller forms Bone Beach area reward
Frozen Horror Coltrane Peak Ice projectile spread; freezes ground; phase change at half health Phase 1: Thermal Pack trinket negates the frozen-ground slow entirely — equip it. Keep moving in wide arcs to stay ahead of ice patches. Phase 2 (half health): Adds fast dash attacks to the pattern. When the dash starts, burrow or jump — never sidestep. After the dash, punish immediately before the next ice spread. Steady Soles trinket reduces knockback from the ice slam. Getting hit by a Phase 2 dash because you tried to dodge sideways instead of burrowing Coltrane Peak Generator
Astromancer Astral Orrery Star projectile patterns; gravity-shift mechanic Star patterns: Watch the initial launch point, not the projectile. There is a consistent safe lane in the centre-left of the arena for every star volley. Gravity shifts: Burrow the moment the arena colour changes — do not wait for the shift to complete. Recall Disc placed in your safe zone lets you teleport back instantly after a failed dodge. This is a pattern-recognition fight; spend the first two attempts learning, not dealing damage. Reacting to gravity shifts after they start instead of burrowing at the colour change warning Astral Orrery progress
Sparkmancer Spark-themed dungeon Electric projectile volleys; spark field hazards Keep maximum distance at all times — electric volleys have wide spread but fall off sharply at range. Burrow through spark fields rather than jumping over them. Evasion Powder trinket gives invincibility frames after each burrow, which pairs well with the constant need to move through hazards. Iron Lung recommended for the extended fight duration. Getting caught in a spark field while repositioning after a volley Area progression
Madd House Haunted manor dungeon Chaotic attack patterns; room hazards In chaotic multi-attack fights, stop and read one attack at a time. Ignore damage opportunities and focus purely on survival for the first attempt. Room hazards are the secondary threat — position yourself away from walls and corners at the start of every new attack phase. Dummy Cache trinket provides a free hit absorption that recharges, essential for learning an unpredictable pattern. Panicking during chaotic phases and running into room hazards while trying to escape an attack Area progression
Malady Plague-themed region Poison and disease mechanics; area denial Poison fights are attrition fights. Prioritise Pit Preserver and Vascular Syrup over damage trinkets — you will take chip damage regardless. Burrow through poison clouds for the fastest way to cross denied zones. Attack only when standing on clean ground. Flame Guard trinket reduces elemental damage and stacks well with Vascular Syrup regen in sustained fights. Standing in a poison zone to land an extra hit, taking avoidable chip damage that compounds over the fight Area progression
Mock Moon Late-game lunar arena Lunar projectile phases; gravity mechanics Late-game gravity mechanics require the same discipline as Astromancer: burrow at the warning, not at the effect. Lunar projectile phases come in predictable arcs — find the gap in the arc and stand in it. Recall Disc placed at your safe arc gap lets you return to it instantly. At this stage in the game your full trinket loadout should be established; do not go into Mock Moon with a half-built set. Repositioning into a projectile arc gap that gets closed by a gravity shift mid-movement Late-game progression
Locomotress Agnes Frozen Trainyard Moving arena; rail-based attack patterns Moving-arena fights punish standing still more than any attack does. Always be moving in the direction the train is travelling. Rail-based attacks come from fixed positions — identify which rail segment is active and move off it immediately. Mist Jar sidearm covers large lateral distances instantly and is the best sidearm choice for train-level fights. Bellows Bustle trinket adds an air dash for extra cross-rail mobility. Stopping to attack without checking which rail segment activates next Area progression
Furgus The Faithful Cathedral / shrine area Faith-based attacks; summoning mechanics Summoning bosses follow the same rule as Skullpox: treat the summons as the primary fight. Furgus is much easier to damage during and after summoning — use that window. Gnawing Ghosts sidearm hits summoned minions from across the arena without requiring repositioning. Seismic Belt trinket extends your attack reach during the clear phase. Do not fight Furgus in full summon waves — always clear first. Engaging Furgus directly while active summons are still alive, getting overwhelmed from both sides Area progression
Lumenarks Light-themed dungeon Blinding light attacks; multi-target beams Light beam fights require you to track multiple hitboxes simultaneously. Burrow is your primary evasion — beams cannot hit you underground. Identify which beam rotates and which stays fixed; the rotating beam is always the priority dodge. Dead Leaf trinket (damage bonus at full health) rewards cautious play: if you avoid the fixed beam entirely, you deal bonus damage on every hit against the rotating-beam window. Getting clipped by the fixed beam while dodging the rotating beam because you tracked only one Area progression
Major Miner Underground mine complex Ground-slam attacks; mine cart hazards Ground slams create shockwaves identical in principle to Smorgasboar — jump immediately, do not run. Mine cart hazards move on fixed tracks; learn the track pattern in the first attempt and avoid those lanes for the rest of the fight. Drill Driver sidearm is thematically and mechanically fitting: its knockback dash repositions you off a mine cart lane instantly. Blaststrike Maul deals strong punish damage after each ground-slam recovery. Running along a mine cart track lane while dodging a slam, getting hit by a cart mid-dodge Area progression
The Congealed Alchemical facility Slime split mechanics; toxic pool hazards Split mechanics work like Mined Mind: pick one fragment and kill it before engaging another. The toxic pool expands after each split — map the safe ground at the start and defend it. Hollower’s Rocks sidearm bounces inside the arena walls and hits multiple fragments without requiring repositioning. Pit Preserver is essential if any pool hazard overlaps a platform edge. Whisper & Vesper’s fast attack speed maximises damage in the short window between splits. Losing track of safe ground as pools expand, forcing a retreat into another fragment Area progression

Still dying to the same boss?

The right trinkets can solve a fight your skill alone can’t. Check recommended loadouts for every situation.

⚡ Best Builds Trinkets Guide Sidearms Guide

Mina the Hollower Secret Bosses — All 9

Nine optional bosses hidden across Tenebrous Isle. None appear on the critical path. Each requires a specific trigger — most are easy to walk past without knowing. Beat all nine to earn the Trinket Bag, extra Spark Container, Health Rose, and Gilded Rod.

Recommended Secret Boss Order

Follow this route to get the highest-value rewards (Trinket Bag, Lace Glove) before mid-game bosses become punishing.

OrderBossWhen AvailableKey RewardMiss Risk
1MiddenImmediately after Queensbury Crypt (need 2 Plasma Vials)Fly Bait trinketLow — area stays accessible
2MaxiReturn to Ossex via right entrance after Queensbury CryptTrinket Bag (extra slot)High — only triggers on that specific approach
3DuginTalk to Ack & Dak in Ossex: High Street after QueensburyLace Glove (attack boost)Medium — random encounter, can miss spawn
4ArmandTry to buy a second item from Legovich in OssexBlacksmith restored (weapon upgrades)Low — triggered by shop interaction
5WillisAfter Nox’s Beast — frog escort from Bayou BackwaterPneumatic Armlet trinketMedium — multi-step quest
6Dark DeluxyColtrane Peak with 2 Spark Containers; escort LuxySpark Container (after healing her)Medium — must heal her post-fight
7MirrenColtrane Peak: Frostbite Woods (skull-block ice puzzle)Blinking Glass trinketMedium — traversal puzzle blocks access
8Evra the UndyingSeptemburg Courtyard with 3 Plasma Vials + traversal sidearmsHealth Rose (max HP up)High — requires late-game mobility
9ThalassionCatch all 15 fish (Fishing Rod required)Gilded RodHigh — near-complete fishing needed

Midden

Secret

Location: Queensbury Crypt — Ancestral Chamber, behind a door requiring 2 Plasma Vials

How to unlock: Spend 2 Plasma Vials on the locked door, then insult Midden in dialogue — the polite option does nothing. The fight does not start until you choose the insult.

Core mechanic: Single-phase melee fight. No environmental gimmick — readable attack patterns throughout.

Strategy: Burrow through his most telegraphed swings, then punish from close range with a fast weapon like Nightstar between recovery frames. Stay aggressive but always keep Joules in reserve to burrow if you misread a tell. Short combos only — his recovery windows are brief.

Common mistake: Entering with only one spare Plasma Vial, or standing in front of him through entire attack strings instead of burrowing through them.

Reward: Fly Bait trinket

Maxi

Secret — Easy to Miss

Location: Road from Queensbury Crypt back to Ossex — right-side entrance only

How to unlock: After clearing Queensbury Crypt, return to Ossex specifically through the right entrance. Maxi ambushes you automatically. If you fast-travel or use a different route, the trigger does not fire.

Core mechanic: Single-phase, high-aggression fight. Speed increases as HP drops.

Strategy: Stay close to bait his melee patterns, burrow through his lunges, and punish with short combos. Do not try to outrun him — his movement speed makes kiting ineffective. Use burrow invulnerability instead of distance to handle his rushes.

Common mistake: Fast-travelling past the encounter or taking the left entrance, missing the fight entirely. Bringing a slow, long-recovery weapon before you know his openings.

Reward: Trinket Bag — increases the number of trinkets you can equip simultaneously. One of the highest-value rewards in the game.

Dugin

Secret

Location: Overworld — Southern Outskirts near the sunbathing man, or near Backwaters in Western Hills

How to unlock: Find children Ack and Dak on Ossex: High Street after Queensbury Crypt. Dugin then appears as a random overworld encounter. You must defeat him twice — one win is not enough to earn the reward.

Core mechanic: Two-encounter quest. His small size causes long attack strings to whiff, which also means your own long strings miss.

Strategy: Let him hop into your attack range and punish with short, fast strings rather than committing to long combos. The second encounter is harder — treat it as a true rematch, not a repeat.

Common mistake: Thinking one win completes the quest. Missing the random spawn window by not checking both spawn locations. Whiffing long attack animations because of his small hitbox.

Reward: Lace Glove trinket (attack stat increase)

Armand

Secret

Location: Ossex — lower area beneath Legovich’s Arms shop

How to unlock: Try to buy a second item from Legovich in Ossex. This triggers a letter from Armand. Dig through the hole at the top-right of the shop to reach the lower arena.

Core mechanic: Environmental gimmick — Armand has heavy damage resistance on solid ground, but takes full damage when standing in lava pools.

Strategy: Lure Armand into lava pools, where he takes normal damage. Use burrow to reposition safely around the lava and to dodge his charges, then strike while he stands in the lava zone. Never fight him purely on solid ground — the resistance makes it a very slow, low-damage fight.

Common mistake: Trying to out-damage his resistance on solid ground. Standing in lava yourself and trading hits instead of exploiting his positioning.

Reward: Full blacksmith service restored — unlocks weapon upgrades and expanded shop inventory

Willis (Wonder Willis)

Secret

Location: Ossex: Bowery — music hall, after a multi-step escort quest

How to unlock: Find a frog in a bucket behind a waterfall on the route down from Nox’s Beast shortcut. Escort him through obstacles to Backwater to reunite with his band. Then reach the music hall in Ossex: Bowery to fight Willis. The frog respawns at the nearest shoreline if you lose him — you do not restart from the beginning.

Core mechanic: Stun-and-throw fight. Willis is largely immune to chip damage — the real damage comes from throwing him into the crowd.

Strategy: Attack to stun Willis, then immediately grab and throw him into the crowd. Chain these crowd throws efficiently rather than trading blows in the centre of the arena. Normal attacks deal very little damage, so do not grind him down with standard combos.

Common mistake: Trying to beat Willis through normal attacks and wondering why he has so much health. Panicking when the frog is lost during the escort and restarting unnecessarily — he respawns.

Reward: Pneumatic Armlet trinket

Dark Deluxy

Secret — Post-Fight Step

Location: Coltrane Peak area — near the Windy Spark Generator, behind a door requiring 2 Spark Containers

How to unlock: Collect 2 Spark Containers, open the two-slot door on the route back from the Windy Generator, then escort Luxy to the Generator to trigger the fight.

Core mechanic: High-speed duel. Dark Deluxy is the fastest-moving secret boss. Slow weapons will consistently miss her recovery windows.

Strategy: Use a fast weapon (Nightstar or Whisper & Vesper) and prioritise short punishes after each readable dash. Dodge diagonally or burrow through her rush, never try to tank it. Whittle her down with efficient small combos rather than trying to land big hits.

Common mistake: Not healing her after the fight. You must use a Plasma Vial on Dark Deluxy after defeating her to receive the Spark Container reward. Skipping this step loses the reward. Also: bringing a slow weapon and trading directly into her rushes.

Reward: Spark Container (max Joule capacity increase) — but only if you heal her with a Plasma Vial after the fight

Mirren

Secret

Location: Coltrane Peak: Frostbite Woods — inside an abandoned carriage

How to unlock: From the Underlab, head right under the ice. Use the skull-marked block to allow the larger ice chunk to regenerate so you can reach the carriage. Talk to Mirren and tell her you’re there to help — this angers her and starts the fight.

Core mechanic: Clone dive attack. When Mirren splits and dives across the screen with clones, dealing damage during this animation is impossible and any attack attempt wastes your opening window.

Strategy: Reserve all aggression for moments outside her clone dive. Play completely defensively whenever she splits — burrow or move to the arena edge. Counter with tightly spaced combos immediately after the clones resolve. Never try to attack through the dive animation.

Common mistake: Attacking during the clone dive and burning your punish window. Standing too close to the carriage edges where dodging becomes cramped and the clone dive clips you anyway.

Reward: Blinking Glass trinket (chance to avoid damage and become briefly invulnerable)

Evra the Undying

Secret — High Access Barrier

Location: Septemburg Courtyard region — mini-dungeon behind a 3-Plasma-Vial gate

How to unlock: From the eastern courtyard near a bone-headed woman NPC, use Burrow Jump, hover, and Drill Driver (or raft) to cross the large gap, then open the gate with 3 Plasma Vials. This fight is gated behind late-game traversal items — it is easy to see the gate early but impossible to reach until you have advanced mobility.

Core mechanic: Multi-threat fight — Evra on her undead steed charges you while simultaneously summoning and vomiting skeletons. The skeletons are both a direct threat and a space-denial problem.

Strategy: Clear skeletons immediately after each summon wave to preserve movement space. Use that open space to dodge the mount’s charges. Burrow under the mount’s charge — do not try to outrun it. Punish Evra only in short windows after a charge, from flanks where skeleton coverage is thin. Survival first; damage second.

Common mistake: Letting skeleton numbers accumulate until every movement direction is blocked. Trying to outrun the mount’s charge instead of burrowing through it.

Reward: Health Rose (permanent max HP upgrade)

Thalassion

Secret — Longest Quest

Location: Backwater region — southeast of Irwin and Durwin’s hangout, accessed via a Fishing Rod slime-climb

How to unlock: Get the Fishing Rod sidearm from Irwin and Durwin in Backwaters. Catch all 15 fish across Tenebrous Isle. One fish must remain uncaught in Backwater. Then use the Fishing Rod on the slime surface near their hangout to climb into the hidden arena. Requires both Fishing Rod and Drill Driver equipped.

Core mechanic: Tiny arena, extremely high damage. Charging bite and wave attacks that chain together in the cramped space. The arena size turns every positioning error into a potential combo kill.

Strategy: Treat this like a rhythm game — pick only the safest windows (after a whiffed charge) to land 1–2 hits, then immediately reposition. Never attack more than twice per opening. Discipline matters more than damage output. Build tuned for crowd control does not help here — this is a pure single-target precision fight.

Common mistake: Over-attacking after each opening and getting trapped by the next wave or charge. Entering with a crowd-control build instead of a precision single-target setup.

Reward: Gilded Rod (upgraded Fishing Rod) from Irwin and Durwin after the fight

Complete Set Reward Summary

All 9

Defeat all nine secret bosses to earn these permanent upgrades:

RewardFromEffect
Trinket BagMaxiExtra trinket slot — equip more trinkets simultaneously
Lace GloveDuginAttack stat increase — speeds up all future boss fights
Spark ContainerDark Deluxy (heal after fight)Increased max Joule capacity
Health RoseEvra the UndyingPermanent max HP upgrade
Gilded RodThalassion / Irwin & DurwinUpgraded Fishing Rod sidearm

Priority order: Maxi (Trinket Bag) and Armand (blacksmith) are the most impactful early. The Lace Glove from Dugin stacks directly with the Trinket Bag if you have room for both trinkets after unlocking the bag.

Recommended Trinket Loadouts for Boss Fights

SituationRecommended TrinketsWhy
Learning a new boss (first 3 attempts) Proto Spark + Vascular Syrup + Iron Lung Proto Spark saves you once; the others reduce attrition pressure
Boss with phase change (health threshold) Dummy Cache + Evasion Powder + Vascular Syrup Phase transitions are the most dangerous moment; extra buffer helps
High movement pressure (tight arena) Bellows Bustle + Steady Soles + Evasion Powder Air dash repositions; Steady Soles reduces knockback; extended dodge window
Confident attempt (know the pattern) Uranium Bracelet + Desperation Bonnet + Valor Medallion Maximum damage output; only use when you are not dying to basic attacks
Sidearm-heavy approach Draining Beastium + Joule Syringe + Windfall Charm Sidearms deal more damage and self-sustain Joule supply
Secret bosses (attrition fights) Proto Spark + Iron Lung + Intravenous Vial Secret bosses often have long health bars — survivability over speed
Trinket Tip → Swap loadouts at Underlab checkpoints between attempts — there is no penalty. If you have died three or more times to the same problem, change something before the next attempt. See Trinkets Guide →

How to Handle Mina the Hollower Boss Phase Changes

Most Mina the Hollower bosses change behaviour at a health threshold. Knowing that a phase change is coming prevents the most common mid-fight mistake: panic when the pattern suddenly shifts.

Phase SignalWhat ChangesPlayer Adjustment
Visual cue — colour shift, screen flash, or animation change Attack speed, new projectile patterns, or arena hazard activation Stop attacking when you see the transition. Take a moment to re-read the new pattern before committing.
Audio cue — music shift or boss voice line Aggressive follow-up attack immediately after the transition Increase distance when the audio cue triggers. The first post-phase attack is often the most dangerous.
Movement cue — boss repositions to centre or edge Arena-wide attack or charge pattern Watch where the boss moves, not just where it was. Centre repositions often mean a wide sweep is coming.

If a phase change is catching you off guard repeatedly, spend one attempt just observing — do not attack at all. Learning the transition timing is worth more than one damage attempt.

Loadout Tip → A trinket that helps in phase one may become a liability in phase two. If a fight gets harder mid-way through, reconsider whether your current build solves the new pattern or the old one. See Trinkets Guide →

What to Read Next

Once you have your boss prep routine down, these two pages will help you go deeper:

Mina The Hollower Bosses FAQ

How many bosses are in Mina the Hollower?

26 confirmed major boss fights total, plus 9 optional secret bosses hidden behind side quests, locked doors, and chance encounters. The community database (meowdb) lists 33 total boss and mini-boss entries including sub-encounters.

What is the first boss in Mina the Hollower?

The Nether Kraken, encountered in the prologue on the Ossex Coast before you enter Tenebrous Isle.

How do I find the secret bosses in Mina the Hollower?

Each requires a specific trigger. Midden: two Plasma Vials + insult dialogue in Queensbury. Willis: frog band quest + music hall. Armand: try to buy a second weapon from Legovich. Dugin: talk to Ack and Dak in Ossex, random encounter. See the secret boss section above for all 9 conditions, or check the Walkthrough for region-specific trigger timing.

What do I get for defeating all 9 secret bosses?

Trinket Bag (equip more trinkets), Spark Container, Health Rose, and Gilded Rod.

What trinkets work best for bosses in Mina the Hollower?

Proto Spark for learning. Uranium Bracelet for confident damage runs. Desperation Bonnet for aggressive low-health play. Always swap at Underlab checkpoints between attempts. See the full Trinkets Guide and Builds Guide for boss-specific loadout recommendations.